Adjust Printer Margins on Mac OS X
One of the nice things with Mac OS X is that all three browsers that I tested (Safari, Firefox and Opera) have the exact same settings for adjusting the margins of printed pages. Also, once you add this new "No Margins" setting in one browser on your Mac, it'll be available not only for all the browsers you may have installed, it will also be available for any other applications on your Mac! Very handy huh :)
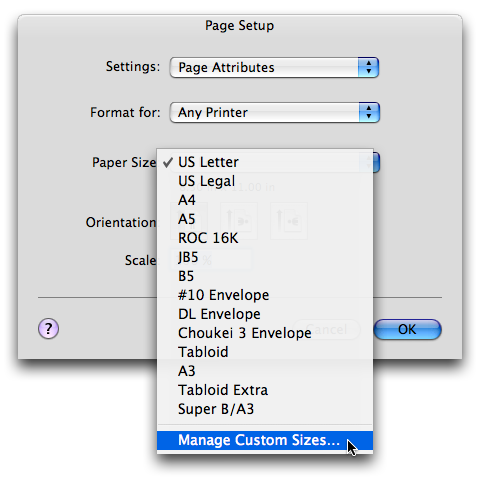
Step 1: Open Print Page Setup
To begin, click ⌘P, or go to File -> Page Setup (in Firefox) or File -> Print (Safari and most others) to open the Page Setup settings. In the drop down list next to 'Paper Size' choose 'Manage Custom Sizes'. Here's a screenshot to show you the steps:
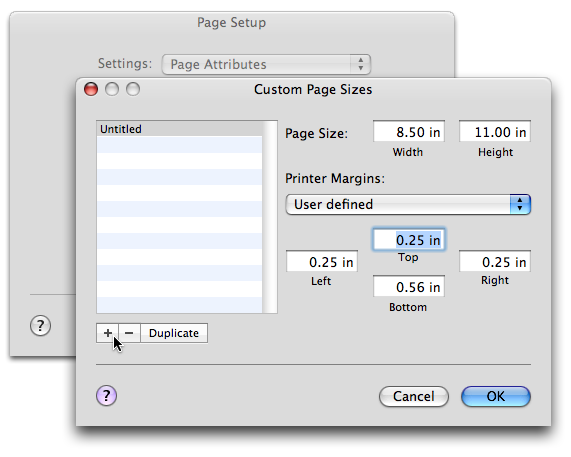
Step 2: Add A Custom Page Size
In this window, click the plus sign, rename (double click on it to be able to edit the name) the new custom print setting from the default 'untitled' to something more memorable and descriptive like 'No Margins'.
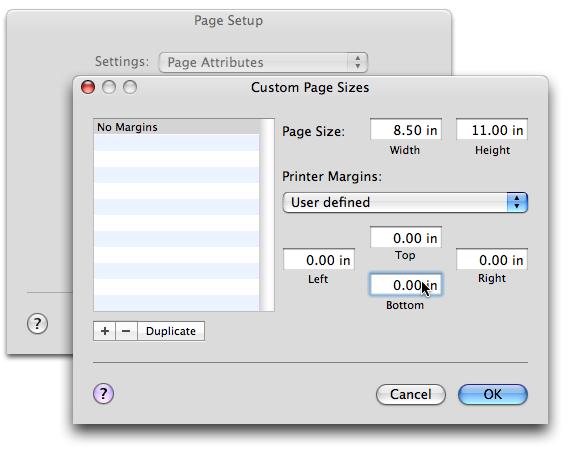
Step 3: Remove Margins
Then simply type a zero into the top, right, bottom and left spaces like in the screenshot below. If your printer doesn't like taking a zero, try a small margin like .5, each brand is different so your results may vary. That said, mine takes a zero margin but will leave a very tiny bit around the edges anyway.
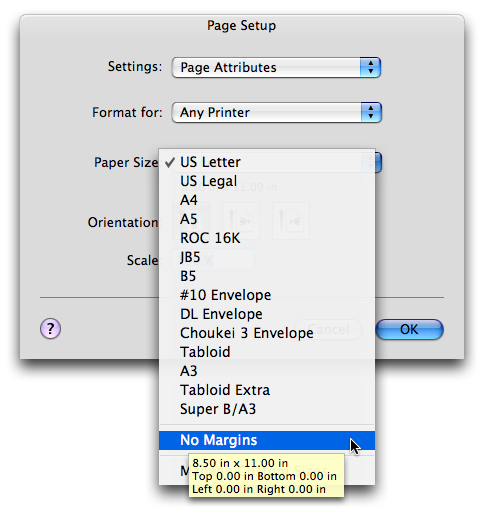
Step 4: Going to print
When you need to print something without margins (a large image for example), go back to Print... (⌘P) and switch paper size to 'No Margins' (or whatever you'd called your custom page setting). When you'd like to have the defaults back, just change the dropbox to showing US Letter (or the default print setting if it's different in your case).
 Car Signs
 Pretty Lace Labels
 Baby Girls 1st Birthday
 Baby Boys 1st Birthday
 Printing Practice
 Reward Coupons
 Vintage Stationery